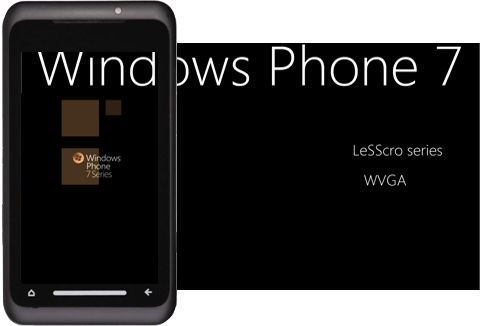
"Metro is an internal code name for a typography-based design language created by Microsoft. It was created as a product of Microsoft's user interface design work on some of their media products like Zune and Windows Media Center, for major utilization in their mobile operating system, Windows Phone 7", wikipedia.org
Continuing with Metro UI I will try to give here a bunch of information that seems to be quite scattered around the web and I will show how easy it is to build a sample window (no resizing) with WPF which will look like Metro.
The first place one should study is the official guidelines of Microsoft. There you will find all the documentation you need about the logic of Metro, design guidelines and Photoshop templates of icons, buttons etc. There is however a better alternative for the icons. Here you can find all the standard Metro UI icons in one zip all in png format, ready to use in your project.
A few other really interesting projects that apply the Metro UI are the following:
Another important aspect of the UI in order to look proper has to do with the fonts. In most projects you might find styles that refer to the Segoe WP (from Windows Phone) fonts. While these fonts are also available for your PC and can be easily installed (either standalone or through the WindowsPhone tools) you should avoid it when you are building a WPF application. Segoe UI or Segoe Light render much better, especially for small sizes (below 15).
So going back to our sample window, we will build a simple WPF project from visual studio, and we will make our MainWindow look like a Metro one. Our window's xaml should look something like that:
<Window
 x:Class="WpfMetroWindow.MainWindow"
 xmlns="http://schemas.microsoft.com/winfx/2006/xaml/presentation"
 xmlns:x="http://schemas.microsoft.com/winfx/2006/xaml"
 Title="MainWindow"
 Height="470"
 Width="900"
 IsTabStop="False"
 AllowsTransparency="True"
 Background="{x:Null}"
 BorderBrush="#FF3F3F3F"
 PreviewMouseMove="HandlePreviewMouseMove"
 SnapsToDevicePixels="True"
 TextOptions.TextFormattingMode="Display"
 TextOptions.TextRenderingMode="ClearType"
 ResizeMode="NoResize"
 WindowStyle="None"
 WindowStartupLocation="CenterOwner">
 ...
So with a no border, no resize, white and transparent window we are ready to begin. The next step is build the shadow around the edges. This can be accomplished easier that one might think. All we need is a border with the dimensions of our window which will have a shadow effect on it.
<Border
 x:Name="m_edgeBorder"
 x:FieldModifier="private"
 Margin="10"
 Background="White"
 IsHitTestVisible="False"
 IsEnabled="False">
 <Border.Effect>
  <DropShadowEffect
   Opacity="0.999"
   BlurRadius="16"
   ShadowDepth="0" />
 </Border.Effect>
</Border>
But since we have the window with no border we have two important issues: we have to find a way to move (drag) the window around and find a button that will close the window. For the first problem we create a rectangle on the top of the window and we attach to it's PreviewMouseDown event.
<Rectangle
 Height="28"
 VerticalAlignment="Top"
 Fill="White"
 PreviewMouseDown="HandleHeaderPreviewMouseDown" />
and then we have
private void HandleHeaderPreviewMouseDown(
Object sender,
MouseButtonEventArgs e)
{
 m_headerLastClicked = DateTime.Now;
 if (Mouse.LeftButton == MouseButtonState.Pressed)
        {
  DragMove();
 }
}
Now for closing the window we create a button with a custom style (we could also create a button template and give it one of the Metro png files we downloaded earlier).
<Button
 HorizontalAlignment="Right"
 Margin="500,6,8,0"
 VerticalAlignment="Top"
 Style="{StaticResource ChromeButtonStyle}"
 Click="HandleCloseClick">
 <TextBlock
  TextWrapping="Wrap"
  Text="r"
  FontFamily="Webdings"
  Foreground="#FF919191"
  FontSize="13.333" />
</Button>
I know I've chosen a really weird way of showing the "X" on the close button but trust me it works. Here's a sneak peek.

What I finally added, as I wanted my window to work with Caliburn.Micro, is a ContentControl which will host all the screens into this "shell" window.
<ContentControl
x:Name="ActiveItem"
Background="Transparent"
HorizontalAlignment="Stretch"
IsTabStop="False"
Focusable="False"
HorizontalContentAlignment="Center"
VerticalContentAlignment="Center"
VerticalAlignment="Bottom"
Margin="13,0,12,13"
MaxHeight="375" />
So that's all! We will find just one more method on the cs file which I haven't talked about. It's trivial though, just changes our pointer to arrow when moving the window. I haven't also showed the styles that you will also find in the code and the fonts that I use for the sample menu. You can find the code on my google code repository.
P.S. Special thanks to my bro for all his work with styles! He is the man ;)